Installation of CamDRAW
Installing the CAM plugin is quick and easy and takes only about two minutes. In this step-by-step guide, we’ll show you how to install CamDRAW and get started right away.
(1) Download the setup of CorelDRAW CNC Plugin from here
(2) Close CorelDRAW when the application is running
(3) Start the setup program by double-clicking

(4) The installation program automatically detects all installed CorelDRAW versions (32/64 bit). Select the CorelDRAW version in which you want to install the CNC / Cutting Plugin. The 32/64 bit versions and the installation directory are automatically set when the CorelDRAW version is selected.
(5) Accept the license agreement by checking the box
(6) Click on "Install"
(7) After the installation you can close the setup program
(8) Open CorelDRAW
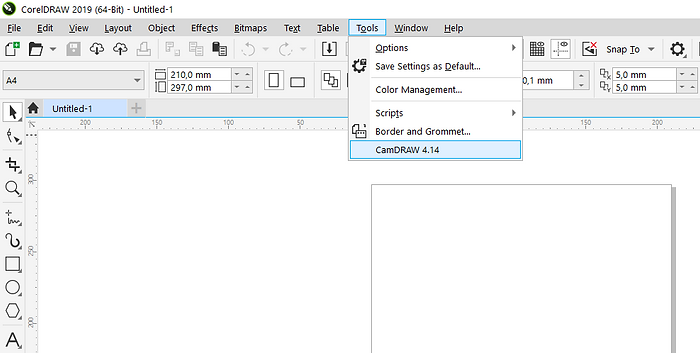
(9) Go to the main menu of CorelDRAW under "Tools"
(10) Click on CamDRAW at the bottom of the menu (see image)
(11) The CorelDRAW G-Code plugin starts and is integrated into the CorelDRAW interface on the right-hand side (Add-ons). When you install CamDRAW for the first time, the trial version is automatically activated when it starts
(12) If necessary, adjust the dock width by dragging with the mouse
(13) Done!
Important note: If you do not see CamDRAW under "Tools". Quit CorelDRAW. Restart CorelDRAW and simultaneously press and hold the "F8" key while CorelDRAW starts. A message to reset the workspace appears. Confirm with Yes. You will now see CamDRAW under "Tools".
CamDRAW successfully installed in CorelDRAW:
